Embedded Databases
An embedded database doesn’t need a server: data is stored on the same machine as the application that uses it (typically in a sub-folder of the application).
Advantages
- Extremely fast read/write operations.
- Not dependent on a database hosting service, avoiding all associated costs.
- No need for a network connection because queries are executed locally.
Drawbacks
- The database is not shared between different machines, and is therefore limited to storing local data.
- Execution speed of queries is harder to predict because it depends on the local machine.
Java examples using Eclipse
For this example, we will use two popular databases:
Step 1
Download the latest “Java Database Connectivity” (JDBC) libraries in JAR form. For this example, we are using the following (click here for all H2 versions, and here for all SQLite versions):
- H2: https://repo1.maven.org/maven2/com/h2database/h2/1.4.200/h2-1.4.200.jar
- SQLite: https://repo1.maven.org/maven2/org/xerial/sqlite-jdbc/3.34.0/sqlite-jdbc-3.34.0.jar
Step 2
In Eclipse: Preferences>Java>Build Path>User Libraries>New
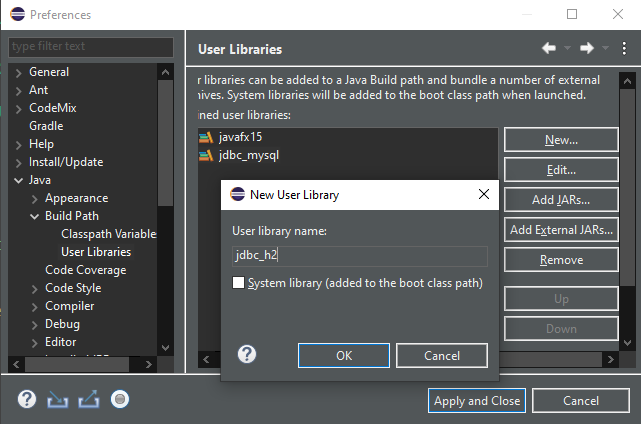
Name it “jdbc_h2”, click “Add External JARS” and select the file “h2-1.4.200.jar” that you downloaded in the previous step.
Do the same with the SQLite JDBC, using a different user library called “jdbc_sqlite”.
Step 3
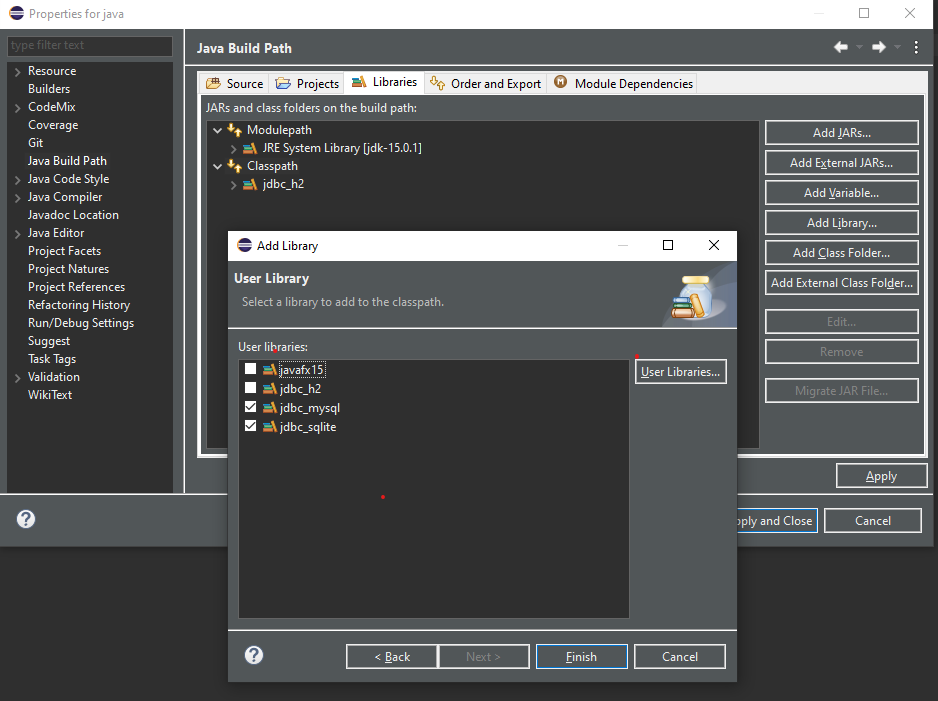
Using a new Eclipse Java project, or an existing one:
- Right click on the project name in the package explorer,
- select “Build Path”, then: Configure Build Path>classpath>Add Library>User Library
- select both “jdbc_h2” and “jdbc_sqlite”
- click “Finish”
Creating and executing queries using H2
In your Eclipse project, create a new package called “embedded_db_test”, and inside it create a new class called “TestH2” consisting of the following:
package embedded_db_test;
import java.sql.*;

public class TestH2 {
    public static void main(String[] a)
            throws Exception {
        Connection connection = DriverManager.
            getConnection("jdbc:h2:./databases/h2_db1", "root", "");

        Statement statement = connection.createStatement();

        statement.execute("DROP TABLE IF EXISTS car;");

        String createQuery = "CREATE TABLE car ("
        		+ "   id INT NOT NULL PRIMARY KEY AUTO_INCREMENT,"
        		+ "   brand VARCHAR(50),"
        		+ "   model VARCHAR(20) NOT NULL"
        		+ ");";

        statement.execute(createQuery);

        statement.execute("INSERT INTO car(model) VALUES('Coccinelle')");
        statement.execute("INSERT INTO car(brand, model) VALUES('Renault', 'Clio')");
        var carSelection = statement.executeQuery("SELECT * FROM car");

        while ( carSelection.next() ) {
        	System.out.println("Car: " + carSelection.getString("model") + "(" + carSelection.getString("brand") + ")");
        }

        connection.close();
    }
}
Click here to download TestH2.java
When we run it, we obtain the following console output:
Car: Coccinelle(null)
Car: Clio(Renault)
The brand for the first car is null because we did not set it in the first insert statement.
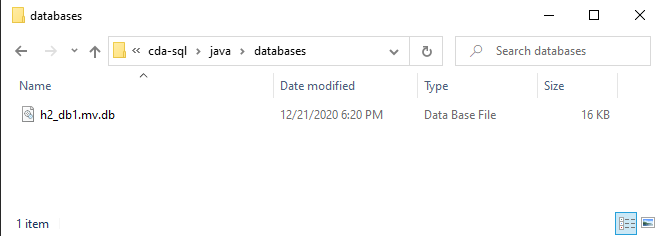
Databases are automatically created if they don’t exist when a connection is opened: after we have run this code, we can find the following file in the « databases » folder located in the same folder as « src » (due to passing the path « ./databases/h2_db1 » to the method getConnection):
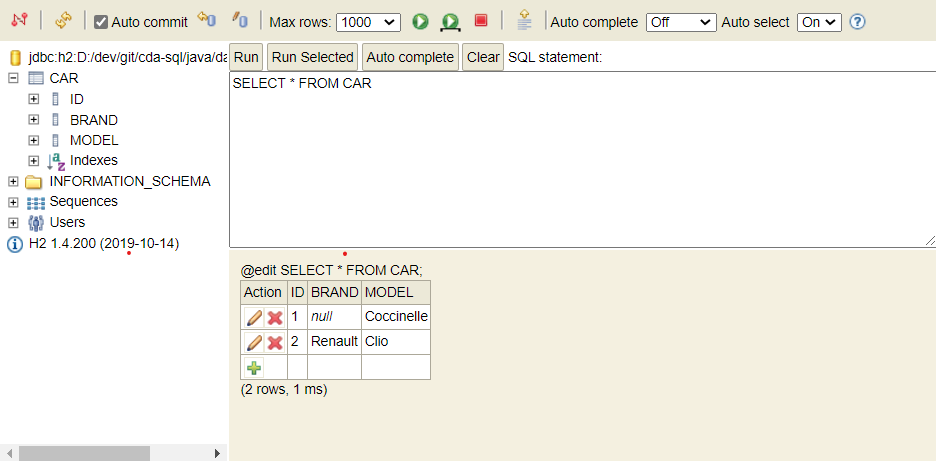
Most databases provide management tools, such as H2’s « H2 Console ». In the application connection dialog, we enter the absolute path of our database and the user name and password that we specified when calling the method getConnection:

We can now see and modify the « car » table:
Creating and executing queries using SQLite
Let’s do the same thing with SQLite. Create another class inside the same package called “TestSQLite” containing the following:
package embedded_db_test;
import java.sql.*;

public class TestSQLite {
    public static void main(String[] a)
            throws Exception {
        Connection connection = DriverManager.
            getConnection("jdbc:sqlite:./databases/sql_lite_db1.db", "root", "");

        Statement statement = connection.createStatement();

        statement.execute("DROP TABLE IF EXISTS car;");

        String createQuery = "CREATE TABLE car ("
        		+ "   id INTEGER NOT NULL PRIMARY KEY AUTOINCREMENT ,"
        		+ "   brand VARCHAR(50),"
        		+ "   model VARCHAR(20) NOT NULL"
        		+ ");";

        statement.execute(createQuery);

        statement.execute("INSERT INTO car(model) VALUES('Coccinelle')");
        statement.execute("INSERT INTO car(brand, model) VALUES('Renault', 'Clio')");
        var carSelection = statement.executeQuery("SELECT * FROM car");

        while ( carSelection.next() ) {
        	System.out.println("Car: " + carSelection.getString("model") + "(" + carSelection.getString("brand") + ")");
        }

        connection.close();
    }
}
Click here to download TestSQLite.java
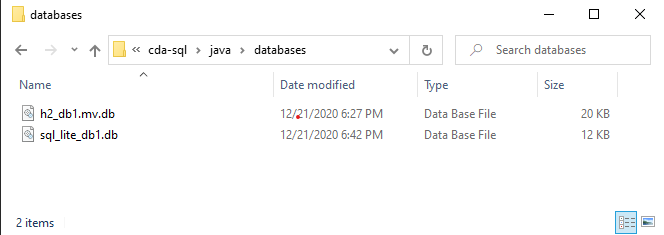
When we run it it, we obtain the same console output as before and a new file is created in the « databases » folder:
Noticing differences
Aside from the getConnection string parameter, The second line of the “createQuery” string differs:
- H2 : “id INT NOT NULL PRIMARY KEY AUTO_INCREMENT,”
- SQLite : “id INTEGER NOT NULL PRIMARY KEY AUTOINCREMENT ,”
The keyword “INT” is changed to “INTEGER” in SQLite for auto increment to work, and “AUTO_INCREMENT” becomes “AUTOINCREMENT”.
Conclusion
Knowing how to use embedded databases is crucial in application development. Most large projects use them to store user and application data. One should be aware that the syntax of queries may differ between different embedded database implementations, which could complicate a switch from one to another in the middle of a project.